Tuesday, October 26, 2010

CardMaker Magazine November 2010

CardMaker is a great magazine and I am so happy to have a card published in the November/December issue.


This is the card I created with the Fall/Thanksgiving theme.

It's published on page 36 and all the detailed are there. 

Thanks for stopping by!
~pat~

Pin It

Monday, October 25, 2010

Happy Anniversary

I made this card for a special lady who is celebrating her 50th Wedding Anniversary.  I am a member of a group called, Special Assignment Angels and we send cards and little gifts to members who are fighting some sort of cancer and going through chemotherapy.  I used the rose image from the Beautiful Life set by Designed2Delight.  I colored 2 of the images and cut out the rose and rose bud and added them directly about the original image with foam dots.  The frame was made with the Labels Four die cut by Spellbinders and embossed with the  Textile Texture embossing folder by Provo Craft.  I added a bow to the rose stem and stamped the sentiment (Everyday Expressions by TPS) in black ink.  Since the color for a 50th anniversary is gold, I added 7 little gold pearls.  A great card for a great couple!


Blessing to You!
~pat~
Pin It

Saturday, October 23, 2010

2 Sisters Challenge 10

2 Sisters Challenge #10

Today's Challenge is sponsored by Purple Panda.  They gave the Design Team 3 images to choose from and I chose this cute little "Bearey".  Perfect for a baby card!

The image was very quick to color with my markers.  I went with a blue/brown them and added a bow and a threaded button to my "Bearey".  I used my circle die cuts to layer the main image.  The background consists of some blue cardstock that was embossed with the Polka Dots (Provo Craft) embossing folder and a piece of DP from the Delicate Dots Collection (SU!).  The sentiment is from Round and Round by Paper Trey Ink and stamped with brown ink.  I am not usually an enabler, but I have to say that this is the first stamp set I have owned by Paper Trey Ink and their clear stamp set quality is top of the line!!  And to add...I didn't buy this one, I won it from someone's blog candy giveaway.  3 blue pearls bring this card to a finish.

Hop on over to the 2 Sisters Challenge Blog and check out all the other Design Team's wonderful creations. 

Blessings to You!
~pat~ 
Pin It

Friday, October 22, 2010

Happy Fall Leaves

This was a fun card to make...


I absolutely love the colors on this card.  Fall...ahhh...my favorite colored season of all.  I used the Leaves image from Designed2Delight and colored them in with my Copic markers.  It was fun to blend all those wonderful colors together.  2 of the top leaves are actually popped up with foam tape to give the card lots of dimension in real life.  I used the circle die cuts (Spellbinders) to make the card base.  The tag is a die cut (Provo Craft), also.  The sentiment is from Amuse and stamped with green ink with 3 brads added below the sentiment.  I used some black embroidery floss for a raffia like bow.  The DP is from  DCWV (Amber Autumn).

Challenges:
Daring Cardmakers: Autumn Leaves
Stampin' For The Weekend: Fall or Halloween
Paper Romance: Round Card


Autumn Blessings to you!
~pat~
Pin It

Thursday, October 21, 2010

Beautiful Blessing

I made this card in honor of Breast Cancer Awareness Month.  It is in memory of all those that have lost their fight against breast cancer and in honor of all of those that are continuing to fight or have won this fight against this devastating disease.

 I used the Beautiful Blessing digital image from Designed2Delight.  It was a freebie last week over at Delightful Inspirations.  I went with a pink theme, as that is the color for Breast Cancer.  I used a combination of markers and pencils to color my image.  I cut it out and layered it with a piece of black card stock and then a pink scalloped die cut.  The DP is Baby Girl Gingham (The Paper Company) and the white piece is embossed with Polka Dots embossing folder (Provo Craft).  The sentiment, Believe, it from the Beautiful Life set by Designed2Delight.  A few pink pearls finish off this card. 

Challenges:
Designed2Delight - Provided image 


Blessings to you, today!
~pat~
Pin It

Monday, October 18, 2010

Friendship

This is the Willow Tree image from the Designed2Delight set, Willow Whimsy.  I love how you can change the entire look of the tree by whatever colors you decide to use on it.  I went with a red/green theme.  I really liked the red flowers on the tree, but they needed just a little bling...some little, tiny gold brads.   What was I thinking...23?!!  Oh well, at least I know they are not going to fall off of the card.  After coloring the tree with my Copics, adding all the brads, I layered it with a piece of red card stock and adhered it to the card base with foam tape.  The DP on the card base in from the Autumn Amber collection by DCWV.  I used one of the sentiments that comes with the Willow Whimsy set and attached it so that part of the sentiment is bowed out and not attached.  If there is a technical term for that, please let me know.  I added a crocheted flower that was layered with a flower punch by SU! and a little white button.  A simple, little square card!

Thanks for stopping by!
~pat~
Pin It

Sunday, October 17, 2010

Autumn Harvest

Am I having fun being a part of the Designed2Delight Design Team?...YES!  Do I enjoy working with all of Faith's awesome designs?...YES!  The design team ROCKS!  I am thinking that we need to get together once a month (?) and create together....hmmm...kinda impossible, since we live all over the country.  Just a great thought though :)...Just sayin'


Here is my design using rubber and digital together.  I started with a white card base and added a piece of embossed (houndstooth) Old Olive (SU!) card stock.  I used the stamp set, Season of Friendship by SU! to stamp the tree in brown and the leaves in  a combo of Old Olive and Summer Sun (SU!) ink to give them the "fall leaf "look.  I used a technique that I believe is call "out of the box" by cutting a square smaller than the whole image and leaving part of it outside of the box.  I then layered the piece with Old Olive and Summer Sun (SU!) card stock and adhered it to the green panel.  I printed the apple basket image from the Apple a Day set from Designed2Delight, colored, cut out and attached with foam tape.  The sentiment is from the Autumn Harvest stamp set by TPC Studio, stamped in brown ink, layered and 2 brown rhinestones attached on each side of the sentiment.   Whew....that's a lot of typing!  I am very please with the way this card turned out and I hope it gives you an idea to combine your rubber stamps and digital images to come up with a great design.

Thanks for stopping by!
~pat~ 
Pin It

Saturday, October 16, 2010

2 Sisters Challenge 9

2 Sisters Challenge 9

Today's challenge over at 2 Sisters Challenge blog is Halloween and the Design Team was provided images from Sassy Studio Designs to use.  I choose to work with Bewitching Betty. 

Some good news:  2 Sisters is going weekly!  You can now play along on a weekly basis, more challenges and that means more fun and....more chances to win a great prize!!!

This was a cute little image to work with and I went with a mostly purple theme.  I have had my image colored up for a few weeks now, but no card.  Well...it finally came together for me just in the nick of time.  I used some DP from K & Co and that make me think...stars.  The image has lots of glittery glow and you know, she is a good witch coming to "witch you a Happy Halloween".    I threaded 3 purple buttons with black floss and layered them on circles of orange card stock and added them to the DP panel.  I added some layering to the image and attached it to the card base with foam tape.  A few glittery stars and a sentiment that I generated on the computer pretty much finish this card.

I actually finished the inside of the card, too...


Hop on over to the 2 Sisters Challenge Blog and check out all the other designs by the Design Team.  Play along and win a great prize from Sassy Studio Designs.

Thanks for stopping by!
~pat~


Pin It

Friday, October 15, 2010

I {heart} You

I was just playing around with some black and white DP by The Paper Studio and wanted to do a more masculine card.  The DP is cut into 7/8" squares and the black card stock layer behind is 1" squares.  I created my own DP panel on the left using the computer and typing love many times.  I added some red ribbon, but no bow, just a knot.  No bows for men!  The metal heart sticker is from Color Bok and the "you" is from Everyday Expressions by The Paper Studio.   Is this masculine enough for a man?

Thanks for stopping by!
~pat~
Pin It

Thursday, October 14, 2010

Warm Mittens

How about we switch gears here today from fall to the holiday season?!!  I love fall and all the wonderful colors, scents and goodies, but then again, I love the Christmas holiday and all the wonderful colors, scents and goodies!  No wonder it's so hard to not gain weight from fall on....too many goodies to resist!!

On to the card for today...

I used the Mitten Dollar Digital Image from Designed2Delight.  I love a cute pair of mittens and remember all too well having 4 little ones and keeping track of 8 mittens.  Of course, when they were real little out came the mitten clips and then...no more lost mittens.  I printed the image twice, colored and cut it out.  I used the sketch for this week from Our Creative Corner.  It's a fairly simple sketch and one that worked great with the mittens.  The DP is Holiday Dots by The Paper Studio and I used the Swirls embossing folder for the white layer.  The bottom mitten was glued directly on the white panel and the top mitten is added with foam tape.  I didn't have a sentiment to fit a round shape, so I created my own on the computer.  I used a Fiskars edge punch for the loopy scallop and some silky green ribbon and a couple red pearl stickers finish this card.  I am very pleased with the way this card turned out.

Challenges:
A Spoonfull of Sugar - Winter Wonderland
Oh La La Creations - Nothing Floral


Thanks for stopping by!
~pat~
Pin It

Wednesday, October 13, 2010

Apple Card Purse

This was a fun project...


I used this tutorial found on SCS to make the card purse.  It was really pretty easy to do.  The hardest part was deciding on what DP and image to use.  I went with this "school themed" paper from DCWV and the apple image from "Apple a Day" digital set by Designed2Delight.  Great set!  I just followed the directions to make the purse and used ribbon for the handles.  I added two red buttons to the front that were threaded with black embroidery floss.  I colored up the apple image, cut it out and attached it to the front of the box with foam tape.  The sentiment is a stamp by Hero Arts.


I kept the note cards clean and simple.  I don't like to give a gift of note cards that require extra postage to mail.  The finished touch is the jumbo paper clip.  I pick these up sometime ago and have been wanting to make one of these.  I used my Cuttlebug and a flower shape to cut out the card stock and some chipboard.  I punched a circle out of the DP, adhered and added a little black button to the center.  I used E6000 glue to hold everything together, but I think you can also use crystal effects.  I have been using crystal effects to attached odd things to my cards and project more often because I don't like to smell the fumes from the E6000 glue.  I made my paper clip double sided, so it looks the same on both sides.


Thanks for stopping by!
Pat


Pin It

Tuesday, October 12, 2010

Halloween Mini Notebook

Just playing around with some mini notebooks that I purchased really cheap at Walgreens some time ago.  I purposely purchased holiday colors...black, red and green for Halloween and Christmas.  The black one was screaming Halloween.  The orange polka dot paper is from My Mind's Eye and I just cut it a little smaller than the notebook and rounded the bottom corners.  The pumpkin was cut out from DP by K & Co, Spooktacular  paper pack.  I added the pumpkin to a scalloped circle black die cut with foam tape and adhered the whole image to the notebook.  A strip of black and a green zig zag (punch from EK Success) were added to the bottom.  I finished off with my favorite embellishment....some ribbon tied to the spirals and a felt flower button topped with a green button.  I am absolutely loving those little felt flower buttons!  I want them in every color.  I hope you like this idea and I know it's not a new idea, but a cute little gift idea that cost next to nothing to make.


Challenges
Shabby Tea Room - pumpkins
One Stop Craft - Alter it


Thanks for stopping by!
~pat~ 
Pin It

Monday, October 11, 2010

Earth Laughs in Flowers

I used the Whimsical Flowers digital image from Designed2Delight.  I printed it and colored with my Copics and decided that the flowers needed a pot.  I just cut out the shapes from brown card stock and ran them through my Cuttlebug using the Tiny Bubbles embossing folder by Provo Craft.  I glued the bottom part of the pot and attached the rim with foam tape.  I added 3 jumbo yellow brads to the center of the flowers.  The border punch is from Martha Stewart.  The sentiment is part of the Willow Whimsy set and you can find it over at  Designed2Delight.   Being a part of the Designed2Delight Design Team is the Best!  Go check out the blog...Delightful Inspirations and play along.

I am entering this card in the following challenges:

Delightful Inspirations - using the Whimsical Flowers Image
Craftilicious - anything goes
Crafty Pad - make something for a friend
One Stitch at a Time - Use a digi stamp
Create4Fun - digital image
No Time to Stamp - back to nature
Stampin' for the Weekend - Autumn Inspiration
Charisma Cardz - Autumn Colours
Digi Doodles - color me orange
Fab 'n' Funky - Digi image


Thanks for stopping by today!
~pat~
Pin It

Thursday, October 7, 2010

Digital Design Idea

OK...here is a different idea using your digital stamps.  Since you can take a digital stamp and resize it to any size you want, why not get the most mileage from your stamps?  I used the Designed2Delight dollar image "pumpkin" and resized it to 8" x 8" and printed it on card stock.  That is what I used for my pattern.  I won't go into all the details, but let me tell you it was pretty quick and easy to do.  If you have any questions, please let me know.  I added a button and some ribbon for the leaves and lots of ribbon and rick rack around the sleeve and bottom of the shirt.  I made 2 of these for my granddaughters.  Just another way to have fun creating!


Just a little hint:  be sure and wash your shirt and fabric before beginning a project like this.

Thanks for stopping by!
~pat~
Pin It

Wednesday, October 6, 2010

Apple a Day

Whew...I don't know what happened, but I lost my template on my blog and I thought, I lost everything.  It was quite a nightmare and now I am left with this very simple blog design thanks to Blogger!  I can create, but I am not as compute literate that I wished I was.  Someday, I will figure it all out.

On to my card for Wednesday....

REMOVED FOR PUBLICATION :)


I used the Designed2Delight, "Apple a Day" digital image.  I am so loving this basket overflowing with apples.   I couldn't decide what color I wanted my apple to be, sooooo...why not red, yellow and green.  Looking at this images makes me crave a nice crisp, juicy apple.  I colored the image with my Copics and used a circle die cut the cut it out and make a scalloped layer.  There is the white card base, then a brown layer and on top of that an embossed green layer.  Then, I used strips of DP (green squiggly is from Pebbles Treehouse and the red stripe is from the Amber Autumn Paper Pack by DCWV) and brown card stock to make my border design.  The loopy punch is from Fiskars and the zig zag punch is from Martha Stewart and I don't remember the exact names of the punches.  I added some yellow brads to the red strip.  I am trying to use up some of those little embellishments that are just sitting around.  I don't know about you, but I have way too many brads that are being neglected!!  As a final touch, I added a red crocheted flower (my own creation) and a yellow felt flower and button.  I found the felt flowers and button at my local sewing store by the buttons.  They are Favorite Findings by Blumenthal Lansing Co.  I love to browse the sewing dept looking for little embellishments for my cards. 

Faith is continually coming up with the most adorable digital images and you should check out the Delightful Inspirations blog. 

Thanks for stopping by!
~pat~
Pin It

Tuesday, October 5, 2010

2 Sister Challenge 8 Animal Fun

I apologize for being late posting this...I was out of town for my Grandmother's funeral and didn't have access to my own computer...which is where my photo was.

This week's  challenge is....

ANIMAL FUN

For this challenge we would like to see animals on your creation.
Robyn's Fetish Digital Stamps And More is proud to sponsor this challenge.


Robyn's Fetish Digital Stamps And More, a division of I Did It Creations, was created and is
 owned by Robyn Weinrib. Robyn offers a wonderful variety of digital stamps and digital papers, designed to meet the needs of all digital paper crafting addicts for every occasion.
Robyn's Fetish Digital Stamps And More is happy to offer the winner of this challenge 5 digital stamps
or 4 digital stamps and 1 digital paper set of their choice.

Robyn was very kind and gave the DT images to showcase during this challenge. Here is my card using "A Little Birdie Told Me" :


I started by printing out my image and coloring it up with my copic markers.  I layered the image with a piece of  yellow and then blue cardstock.  The card base was layered with a piece of DP...a blue plaid that I picked up at Hobby Lobby.  I used a slot punch to run the ribbon behind the image and then tie in a bow with a button added.  The little "hello" image is a stamp by The Paper Studio, Everyday Expressions.  I did some paper piercing around the whole image and added it to the card base with foam tape.


Stop on over at 2 Sister Challenge Blog and check out all the wonderful designs created by the design team.  I hope you will join us in creating your own "Animal Fun" card and posting it so that you will have a chance to win the great prize by Robyn's Fetish.
On a sad note, three of our DT members have decided to step down for various reasons. I have enjoyed working with them and seeing their creations. Jo, Susan & Emma you will be missed!


Thanks for stopping by today!
~pat~
Pin It

Friday, October 1, 2010

Designed2Delight WCMD Blog Hop

Welcome to
Designed2Delight Designer's
World Card Making Day Blog Hop!

If you are just joining us, or if you are lost, you will want to start at the beginning with Faith's Blog, Delightful InspirationYou should have arrived here from Kim's Blog.

Grab a pen and paper! 
Each blog in the hop will have something special for you...either a free digital stamp or a letter of the alphabet.  When you have collected all the letters in the order of the blog hop, they will spell out a special code that will get you a free
This is good until the end of Sunday, October 3rd.

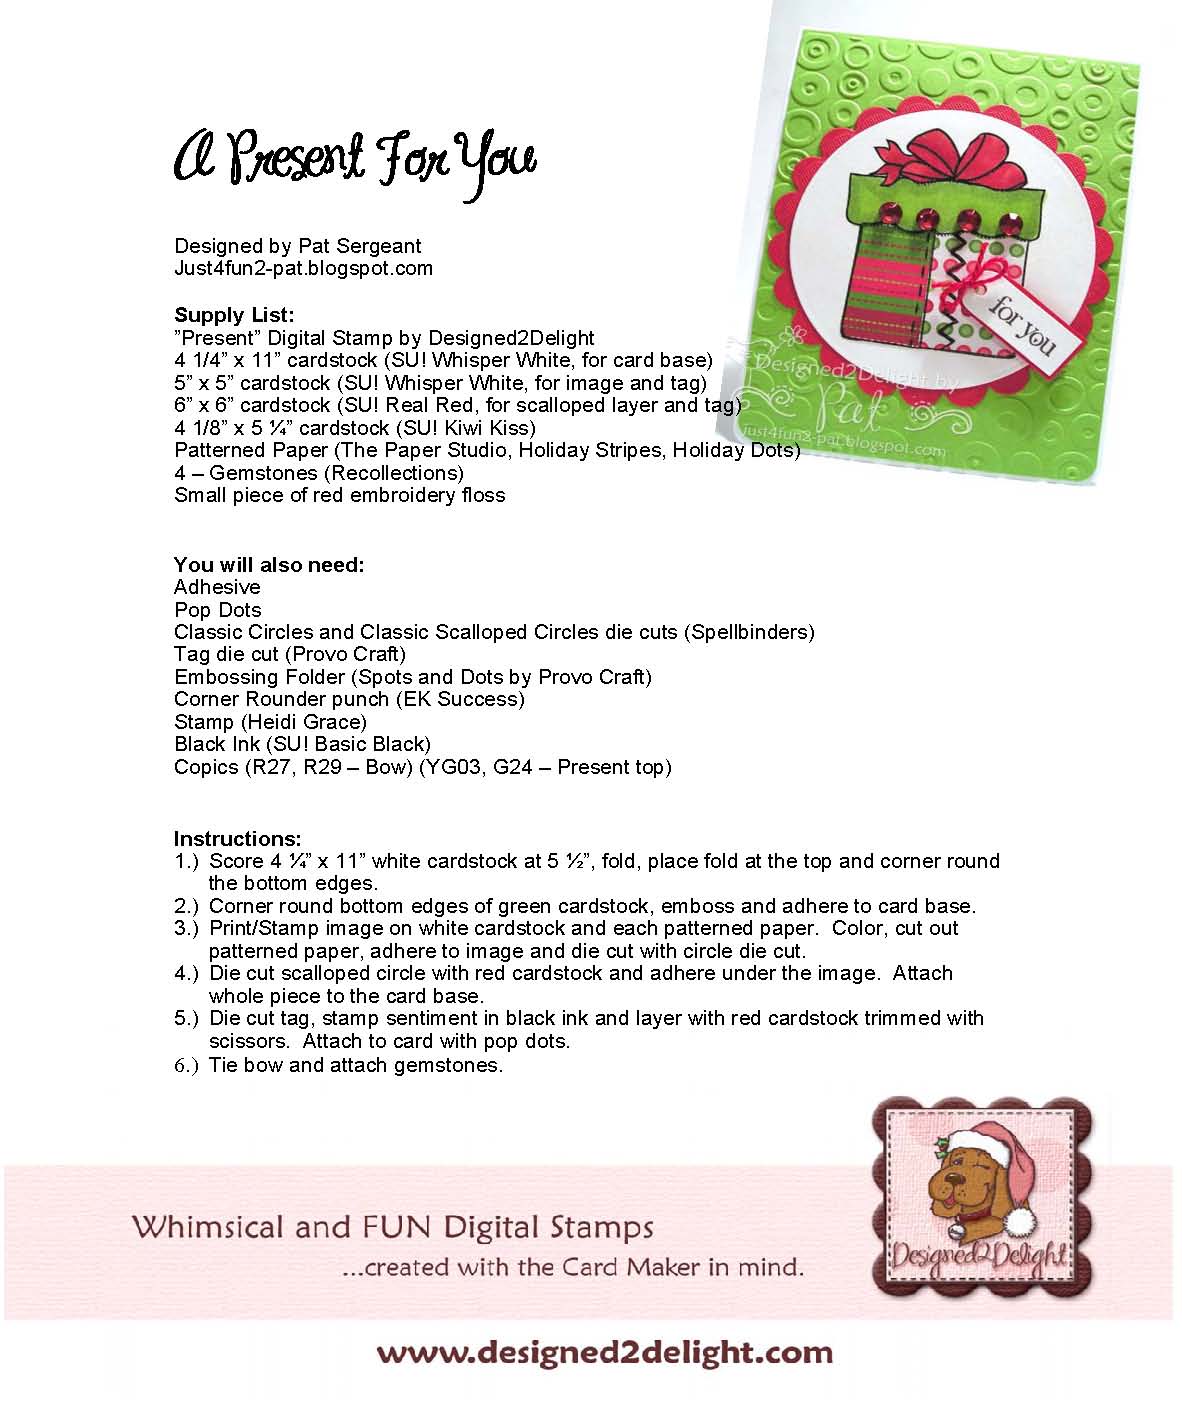
Here is my card using the lovely Dollar Digi Stamp, "Present".


Thank you for hopping along with the Designed2Delight Design Team.  Katie is next on the blog hop.

Please join us at Crafter's Digital Art Center for more World Card Making Day FUN and PRIZES, and an exclusive DISCOUNT for members only.


I hope you are enjoying yourself today and having fun!
~pat~
Pin It

CCAYR October Challenge

It's a new month and that means one more month closer to...Christmas!  The CCAYR (Christmas Cards All Year Round) challenge for October was to make a card that included stitched (faux or real) and distressing.  Here is the card I came up with...


I used a much neglected image from Plum Purdy, "Too Much Snow" for my main focal point.  I colored up the snowman with my markers and cut it out with the Labels 2 die cuts by Spellbinders.  My distressing is the sponged on green ink around the edges of the die cut.  I am not ever sure about distressing.  Maybe, I just need to practice more?  Couldn't hurt anyway.  I added some stitching using green floss and the dashed lines on the DP looks like faux stitching.  I used two different DP's on this card.  The green polka dots is by Martha Stewart and the other is Christmas Stripes by KI Memories.  I cut another die cut to layer the snowman and added it to the card with foam tape.  I used the slot punch by SU to thread the ribbon behind the image.  Just a few little details...fake snow and glitter on the snowman's hat and the pine branches.  I am really pleased with the way this card turned out in the end. 

Go check out all the other CCAYR design team creations and go ahead and get started on your Christmas Cards.  If you post at least 5 Christmas cards using the challenge, you could be in the running to win the monthly prize.  It can be 5 different or 5 of the same card.  Go ahead, you know you want to get a head start on a stress-free holiday!  Tomorrow is World Card Making Day, so make it a fun day!

Thanks for stopping by!
~pat~


Pin It

Wednesday, September 29, 2010

Happy.......Halloween

Just using up some more of the Boo To You Collection by My Mind's Eye.  This is a total non-stamping, non-digital card.

I started with a black card base and rounded the bottom corners. I then added the striped DP and the strip of spooky words.  I cut out a scalloped rectangle to layer behind the sentiment and added a green star.  The whole piece was adhered to the card with foam tape.  Quick and easy peasy!

Thanks for stopping by!  Only 3 days until WCMD!

~pat~
Pin It

Tuesday, September 28, 2010

Plaid Notebook and Matching Pen

I was in need of a notebook to keep track of all my stamping creation details, so what is a paper crafter to do?  Well, first of all look through all the hoarded notebooks and find one that you like and get busy creating.  I used this plaid paper by DCWV to cover the notebook and the pen, too.  I used Mod Podge to attach and as a protective coating for the DP.  I ended up with a fun little notebook to help me stay organized.  This would be a great gift for someone, too!

Thanks for stopping by and I do apologize for my lack of postings.  My Grandmother passed away over the weekend. 

~pat~
Pin It

Friday, September 24, 2010

Designed2Delight World Card Making Day Party!


{RSVP} For the Designed2Delight
World Card Making Day Party!


Are you a participant in the D2D Artist Challenge?
Are you a member of the Crafter's Digital Art
Center D2D Group?
Then you are gonna want to RSVP for the
Designed2Delight World Card Making Day
Party on October 2nd.

Just click here to be taken to the Events page
on Crafter's Digital Art Center and sign up!

Then, keep an eye on the discussion board in
the D2D group site for announcement VERY
SOON!
We are going to give you an exclusive/members
only heads up!!
So if you are not a CDAC/D2D group member
yet...you'd better join...there's gonna be prizes
and tons of chatting and fun!
WOOT!  It's gonna be awesome!
Can't wait to see you there!

~pat~

Pin It

Wednesday, September 22, 2010

Scaredy Cat and Good News!

This image is Scaredy Cat by Designed 2 Delight and it was a freebie if you have been playing along on the Delightful Inspirations Blog every week during the month of September.  They have given away some really cute images this month!

I wasn't too sure about this image before I colored it up. All colored and added to the card, it really came to life. I left the front without a sentiment. I kinda ran out of space for one and decided just to add one to the inside only. I started with a white card base and cut a piece of DP (Amber Autumn Stack by DCWV) a little smaller than the card base.  I adhered a piece of ribbon horizontally around the center of the DP and notched the ends.  After coloring my image, I layered it on a piece of orange and black card stock.  The black card stock was punched on the lower edge with the Arched Lattice Edge punch by Martha Stewart.  The whole image was added to the card with foam tape.  I found the cutest little felt flowers in the sewing department and layered and tied 2 of them together with black floss and attached to the ribbon with a glue dot.  I added Crystal Effects to the mouth, eyes and nose of the pumpkin and to the nose of the cat.  Makes the pumpkin glow like there is a candle lit inside.  That is all for the card.

This card will be entered into the following Challenges:
Delightful Inspirations - provided digital image
Creative Card Crew - Fall or Autumn
Paper Playtime - Autumn 
Stamps R Us - Halloween
Paper Sundaes - Fall or Halloween Colors
Totally Gorjuss -Wild Thing (animals)
Stamp Something - Use Something Digital
Pixie Dust Studio - Fur or Feathers


Now on to my Good News...

I was selected to be on the design team for Designed 2 Delight.  I am excited and can't wait to start designing with their wonderful images.  Congrats to all the other new team members!

Thanks for stopping by today!
~pat~


Pin It

Tuesday, September 21, 2010

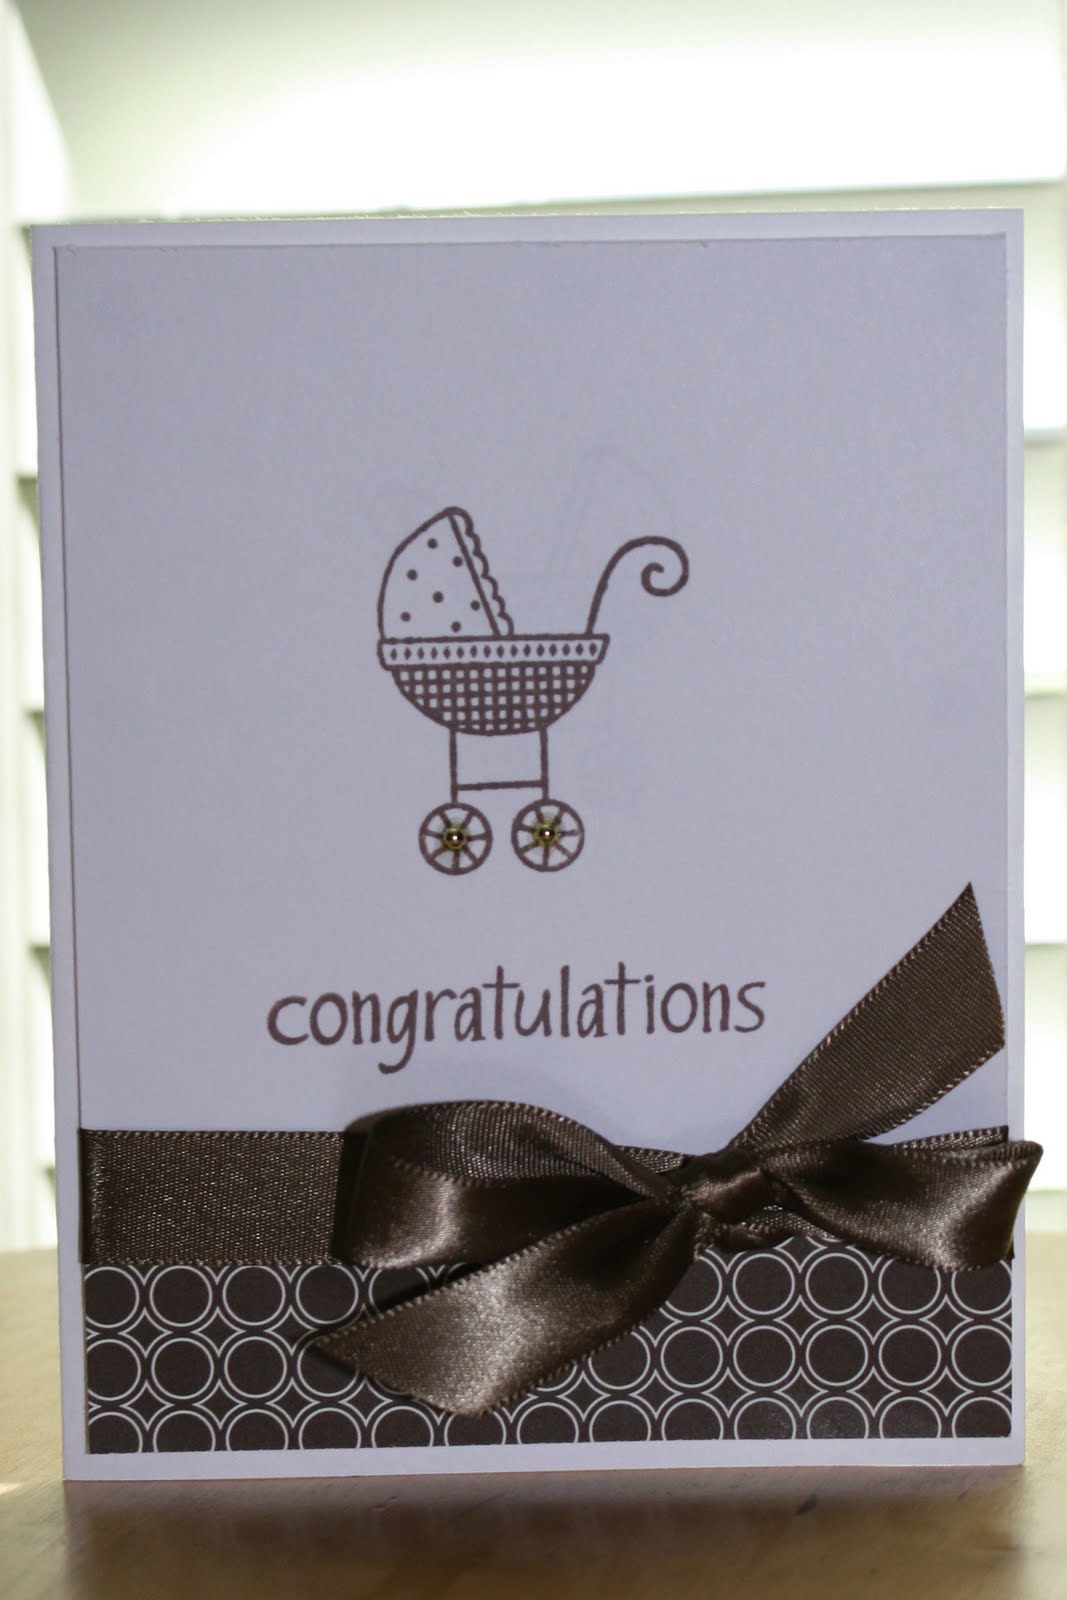
Brown Baby Buggy

Yep...it's a brown baby card.  It was made for a publication call, but not picked up.  The theme was a baby card NOT using the usual pink or blue of any shade. 

Brown is such a popular color right now that I think you could use this card for a boy or a girl.  I, also made it Clean and Simple.  I stamped the image (Baby Buggy by Stampabilities) and the sentiment (Everyday Expressions by The Paper Studio) in brown ink on a white card base.  A strip of DP (Man of the House by Bella BLVD) and a ribbon tied in a bow almost finish this card.  I added 2 gold pearls to the center of the buggy's wheels and that's that!

Thanks for stopping by!
 ~pat~


Pin It

Monday, September 20, 2010

Love is in the Air

Love is in the air...That's what I think of when I look at this card that I created.

I made this card for a publication call with a hot air balloon theme, but it wasn't pick up.  I guess, not what they were looking for?  I used the patterned paper from the Love Me Do Collection by My Mind's Eye.  I really like the turquoise/red combo.  I started with a white card base and then cut out a small piece of turquoise card stock and punched the bottom edge with the Lattice edge punch by Martha Stewart.  I added pieces of the DP and ribbon.  The sentiment is stamped in red ink and then I added red metal hearts from ColorBok, layered with a piece of turquoise card stock and adhered with foam tape. 

I am entering this card in the following challenges:
Corrosive Challenges - used unused craft stuff (DP & metal hearts in my case)
Cinema Saturday - use metal
Daring Cardmakers - All up in the air
Alphabet Challenge Blog - U for unused stash (DP & metal hearts)
Cute Card Thursday - Birds or Butterflies 


Thanks for stopping by! 
~pat~

"Love is the greatest refreshment in life."
~Pablo Picasso~
Pin It

Saturday, September 18, 2010

2 Sister's Challenge 7

Today is a new challenge over at 2 Sisters Challenge Blog. Today's challenge is being sponsored by Tracy Malnofeski of The Stamping Boutique and she has so graciously provided the images that we created with.  I must say...they are a great company with tons and I mean TONS of great digital images!  Stop by her shop and check out all the great images.


The prize for this challenge are the 2  images that we were given to design with from Stamping Boutique.


We are proud to have been asked to take part in the OWH Birthday Bash during this challenge. OWH is in need of Christmas card so the theme of this challenge is........ Yep, you guessed it

CHRISTMAS!!!

What is Operation Write Home:

Operation Write Home is an organization that sends blank handmade greeting cards for all occasions to deployed service members to write home on. They’ve mailed approximately 500,000 cards so far—and are still going strong! Our challenge to you is to make cards to send to them for our nation’s heroes.

Please Read The Basic Guidelines Here:
it’s important especially to remember that glitter is NOT allowed (it’s a safety hazard to our heroes), handmade cards only, and OWH needs A2 sized cards. “Operation Write Home” needs to be on the backs of your cards—it can be stamped, handwritten, or printed on labels. Please include a packing slip inside your box or envelope, and mail them to any of their shippers listed on the Mailroom page. In your package, you can also include notes written to a deployed service member.
The reason behind our "no glitter" requirement may help to clarify things. It's not about the shiny aspect of glitter. It's about the messy side of it!
Many of our deployed heroes live in very primitive conditions. Primitive as in no showers for a couple weeks. No laundry. Nowhere to get cleaned up. And if they open a box of cards and get sprinkled all over, they might have absolutely nowhere to get rid of all that mess; they may not even realise it's all over them. And if they have glitter on their uniforms it can put them at risk — it can make them visible to night vision goggles, and that is just not a risk we're willing to take!

It's clearly hard for crafters to deal with making cards without glitter; we do realize that. However, we reallllllly ask that you set it aside for cards for OWH! The number of emails asking if this product or that product are okay show us that it's really really really hard — but we do appreciate your efforts to abide by what we need to do to keep our heroes safe!
Shipping Addresses:
When you are ready to send your cards download a packing slip from here and email the shipper that you will be sending your cards to and let them know that your cards are on the way.

Kris Allan

12152 S Summit St

Olathe, KS 66062

Dixie Cochran

9611 Brookdale Drive

Suite 100, PMB 319

Charlotte, NC 28215


Sandy Allnock

35205 13th PL SW

Federal Way, WA 98023


On to my card...


This was the most fun image to color.  The smiles on the snowmen's faces make me smile every time I look at them.  I used lots of red and green  to match the DP from The Paper Studio.  After coloring the image, I layered it with a red and black piece of card stock and a little scalloped border on the bottom.  The whole image was added to the card with foam tape.  I used Crystal Effect to add some shine to the noses and buttons.  The sentiment is by 4 Klear Stamps (found at Hobby Lobby).  After layering with red and black card stock, it was added to the card with foam tape.  Both, the sentiment and the scallop border have tiny red pearls added to them.  Am I the only on out there that has a heck of a time with those tiny little gemstones, pearls, etc., getting them to stick?  Please, tell me not!  If you have a secret, please share.  Thanks! 

Hop on over to 2 Sisters Challenge Blog and check out all the other fabulous Design Team's projects.  We would love to see you post your Christmas cards. Remember...NO GLITTER or GLITTER PRODUCTS

Thanks for stopping by!
~pat~
Pin It

Friday, September 17, 2010

Paper Piecing Presents

Just a little tongue twister for you today...Paper Piecing Presents.  This is a rejected submission for a popular paper crafting magazine.  It was all about techniques and I did my best using paper piecing and keeping it on the easy side for all levels of card makers.  But, sometimes you win and sometimes you don't and life goes on and I just keep making more cards because it is my creative outlet and what makes me happy.


I used the Be Loved collection of papers by My Mind's Eye for this card.  I stamped the row of presents on the card and then stamped them again on the different patterned paper, cut them out and adhered them on the card.  I added the pearls from Recollections to each present and stamp the sentiment in black ink.  The sentiment is from Studio G.  Two strips of patterned paper, one plain and one with a scalloped edges were layered and added to the left edge of the card and then tied with a sheer ribbon. 

Thanks for stopping by today!
~pat~ 

"Laughter is an instant vacation."
~Milton Berle~
Pin It

Thursday, September 16, 2010

Another Halloween Card

This one isn't quite as C&S as yesterday, but it's cute!

Once again, I used the DP from the SpookTacular Collection by K& Company.  Lots of lucious Hallween papers.  This time, I cut out 3 of the pumpkins and adhered them to the white strip of cardstock with the middle one popped up with foam tape to add a little dimension.  The whole piece was layered on top of a strip of the striped paper with a black scalloped layer. Some black ribbon and 3 assorted brads added to the sentiment finish off this card.   

Thanks for stopping by!
~pat~
Pin It

Wednesday, September 15, 2010

C&S Halloween

It's a clean and simple Halloween card....


I used the SpookTacular Collection of DP by K& Company.  I love all the wonderful Halloween designs and colors in this collection of papers.  They even have one that is all pumpkins and that is what I used on my sentiment circle.  I just cut out one of the pumpkins and attached it to my computer generated sentiment.  Pretty quick and easy to duplicate.  I added 3 black pearls to the bottom for a finishing touch.  Halloween will be here before you know it!

Thanks for stopping by!
~pat~


Pin It

Tuesday, September 14, 2010

Designed 2 Delight Flower Bear

If you played along with the Delightful Inspiration challenge last week, you were emailed this cute little bear image holding a string of flowers.  I am so glad that I did that challenge and here is mine new one for this week using the Flower Bear.  He was colored with my markers and had some Crystal Effects added to his nose, buttons and the center of the flowers.  The card base is white cardstock layered with blue cardstock, a piece of DP from the Love Me Do collection by My Mind's Eye, a piece of green scalloped border and ribbon that separates the 2 piece of paper on the base.  I love the sentiment stamp...it was $1 bargain at Michaels by Studio G.  I added 2 crocheted flowers, one blue and one green with a yellow button for the center.  I am really liking the way this card turned out and I hope you do, too!

This card will be submitted for the following challenges:
Delightful Inspirations - provided image
Craft Ho's - Green, blue and yellow
Paper Sundaes - Minimum 3 different embellishments
Stamp, Scrap and Doodle - Thank You projects
Totally Gorjuss - Flowers
Crafty Calendar - Blue & flowers
Shirley2Girls - Critter theme and Spots or dots
Wild Flower Patch - Scallops and buttons
Everybody-Art-Challenge - Homemade Flowers


Thanks for stopping by!
~pat~
Pin It

Monday, September 13, 2010

Back To School Apple


I am loving this adorable Apple with a Worm image from Meljen's Designs.  I made another school related card.  It all started with the Apple/Worm image that I colored up with my markers.  The card base went in many different direction before I settled on this design.  The DP is a combo of different companies.  The lined abc paper is Story Hour by October Afternoon and the pencils are The Boyfriend Collection by Cosmo Cricket.  They were add to a piece of yellow cardstock and then embellished with a piece of ribbon right where the 2 designs meet.  I added 3 black circle punches to the ribbon and top them with Crystal Effects to give a rivet look.  The apple/worm was added on top of the Story Hour paper with foam tape.  The whole piece was backed with a piece of black cardstock and then adhered to the white cardbase with foam tape.  For as easy as this card looks to make, it took me foreva' to bring it all together, which usually means leaving it be for a while.  This would make a great set of notecards for a special teacher. I hope you are enjoying the back to school days!

This card will be submitted for the following challenges:
Meljen's - Back to School
Stampin' Sisters in Christ - Faux or Real Stitching
Sweet Stampin - Notecards
AiFactory - Back to School
Creative Card Crew - Back to School
The Pink Elephant - Back to School

I get updated challenges everyday over at Karen's blog Feline Playful.  She does an awesome job of keep track and posting all the wonderful challenges throughout blogland and I can't thank her enough for all of her work.  You will want to become one of her followers when you check out the blog candy she is offering.  Don't wait...go now and check it out. 

Thanks for stopping by today!
~pat~


Pin It

Friday, September 10, 2010

Pumpkin Boo


How cute is this lil' pumpkin?  I used a free digital image of a pumpkin that Jane of Plain Jane was so nice to design and share.  It was just a pumpkin, but I thought it needed a cute little face and so after coloring the pumpkin with my markers, I added the face using a sharpie black pen.  Well, I could stop there and make my own sentiment, too.  I don't know if you can tell from the photo or not, but I added Crystal Effects to the eyes, nose, dots in the corner of the mouth, the dots on the letters and the 3 dots in the upper left corner of the card.  Wow...I am sure some of you have already figured this out...I punched little black circles out, glued them to the card and added Crystal Effects and oh my goodness...no need to buy those little stickers that look like brads or gemstones, I can make my own and whatever color I desire.  Just a little tip incase you didn't already know that.  The paper is from the Spooktacular by K & Company.  I am getting a lot of mileage out of this paper stack.  That pretty much does it for this card.

I used the sketch from this week's challenge at Card & Things Challenges.
Submitted for Sew Many Cards (Halloween)
Charisma Cardz (Try Something New)

Thanks for stopping by!
~pat~
Pin It

Thursday, September 9, 2010

Fall Wreath Thanks

A fall thank you card.  I pick up this free digital image from Designed 2 Delight.  I love all the fall leaves and used my markers to color in all the wonderful colors of fall.  I can't wait to smell the cool, crisp air of fall.  I used Mercy's sketch to design my card.  I used paper from the Amber Autumn Card Stack by DCWV and added some hand stitching on the left side of the strips of paper with embroidery floss.  The main image is popped up with foam dots and I added a little tag for my sentiment from Studio G.  Just a little button, which started out white and I colored it red with my marker to match finishes off this fall card.

This card will be submitted for the following challenges:
Tuesday Throwdown 16 - celebrate fall
Digital Tuesday - dots and stripes
Your Next Stamp - Anything Goes
Stars and Stamps - Fall Thank You card
Fab 'n' Funky - What'eva'
Delightful Inspirations - use provided image
Southern Girls Challenges - Anything Goes
Paper Play - Autumn


Thanks for stopping by!
~pat~

"All seasons are beautiful for the person that carries happiness within."
~Horace Friess~
Pin It
Thanks for visiting!